fastlane 安装、使用、更新和卸载
引言
当某种技术到达一定程度,就会出现相应的自动化工具,来节省某个开发环节的时间。如 fastlane

fastlane 是一个可以发布 iOS 和 Android 应用的自动工具,她能够处理乏味的任务,比如生成截图、处理代码签名、发布应用。
fastlane 为我们开发者提供了很多工具和流程,eg:
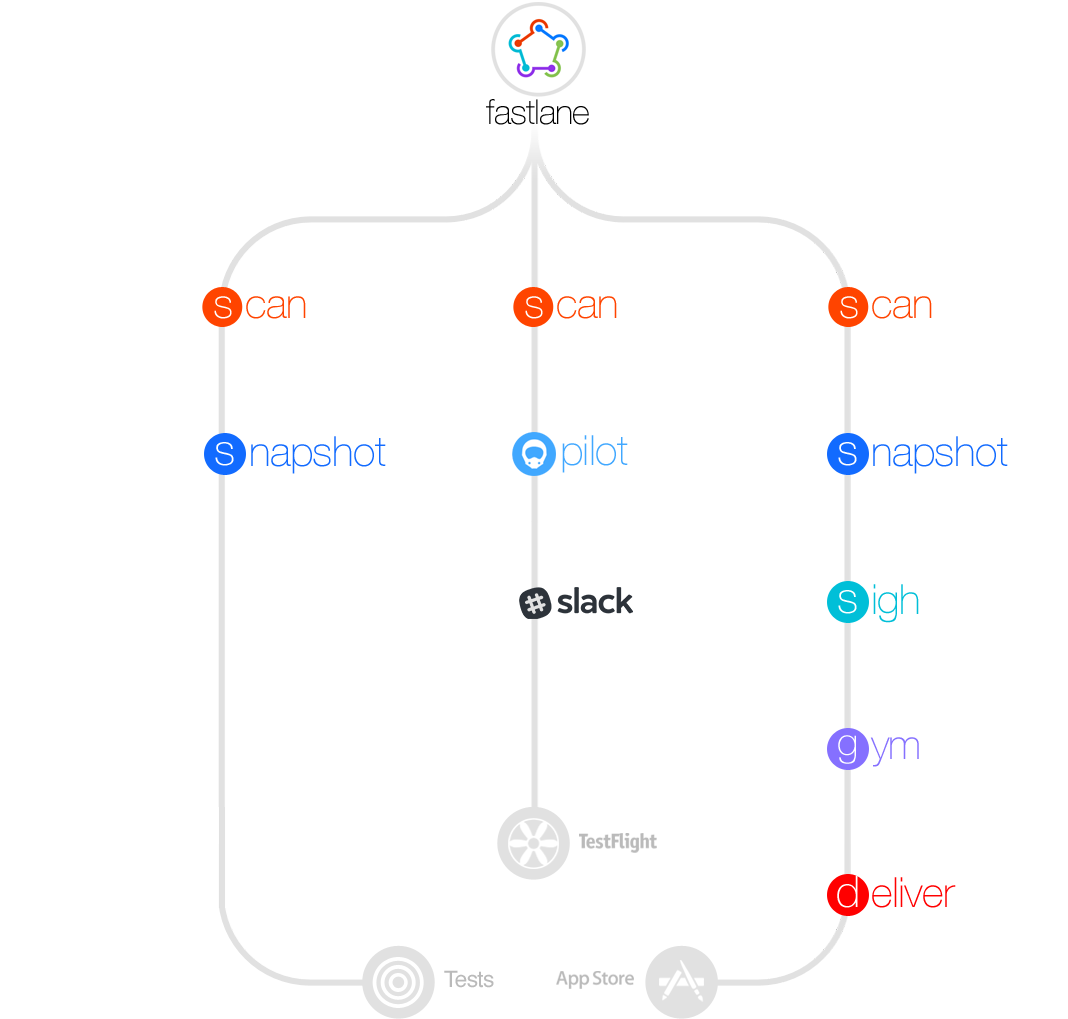
工作流介绍
准备
首先检查是否已经安装 Xcode 命令行工具,fastlane 使用 xcodebuild 命令进行打包,运行 xcode-select --install 命令,根据你的情况进行不同处理。
1、如果弹出下图,请确认是你是否已经安装 Xcode 工具
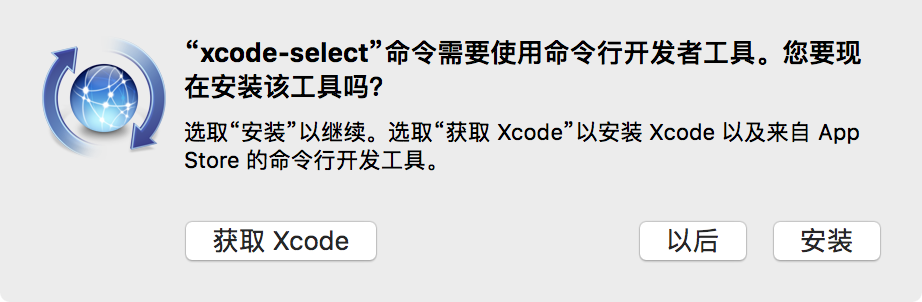
1.1、如果你已经安装 Xcode ,请点击安装,安装最新版的命令行工具。
1.2、如果没有安装 Xcode 工具,如想安装 Xcode ,请点击获取Xcode,将会按 Xcode 和最新命令行工具,点击安装,只会安装最新版的命令行工具。
每次重新安装 Xcode ,都需要更新或者安装 xcodebuild 命令行工具。
2、没有弹出提示,命令行提示 xcode-select: note: install requested for command line developer tools, 则需要运行下面命令,指定 Xcode 命令行工具所在的路径。1
2
3$ xcode-select -p // 打印 Xcode 开发目录
/Applications/Xcode.app/Contents/Developer
$ xcode-select --switch /Applications/Xcode.app/Contents/Developer //进行选择
对其他环境要求,Ruby 2.0.0 及以上版本。
安装
这里主要介绍使用 brew 作为管理工具,你也可以使用 gem 对包进行管理。eg:1
$ sudo gem install fastlane -NV
1、安装 fastlane ,这里使用 brew 管理工具对 fastlane 进行安装
1 | $ brew install fastlane |
2、 重新安装
1 | $ brew reinstall fastlane |
3、安装完成之后,可能会提示 export PATH="$HOME/.fastlane/bin:$PATH" 类似信息,如果 fastlane 在终端中提示不可用,那么需要将其环境添加到系统中。
如果你使用 bash ,你可能需要:
1 | $ touch ~/.bash_profile //建立 .bash_profile 文件,如果此文件存在不需要执行此条命令 |
如果你使用 zsh ,你可能需要:1
echo 'export PATH="$HOME/.fastlane/bin:$PATH"' >> ~/.zshrc
4、升级更新1
2
3$ fastlane update_fastlane
or
$ brew upgrade fastlane
使用
1、在项目目录下,对项目进行初始化。
1 | $ fastlane init //在 init 过程中会出现 登录开发者账号,输入密码和选中 Targets 类似的交互 |
2、执行1
2
3$ fastlane release --verbose
or
$ fastlane beta --verbose
关于使用的详情说明:
https://docs.fastlane.tools/
Appfile
Appfile 文件用于配置 apple app 账号信息,支持配置单账号和多账号等信息。
1 | for_platform :ios do # for all iOS related things |
上面配置文件,适用于多包名,多开发者账号环境。
若你不知道 itc_team_id ,在 Apple Developer 账号已登录的情况下,访问 此链接 找到与该组织对应的 contentProviderId 字段值即可。
建议将返回的数据格式化后,找到 data 节点下的 associatedAccounts 节点,其中 name 和 contentProviderId 分别为组织的名称和 itc_team_id。
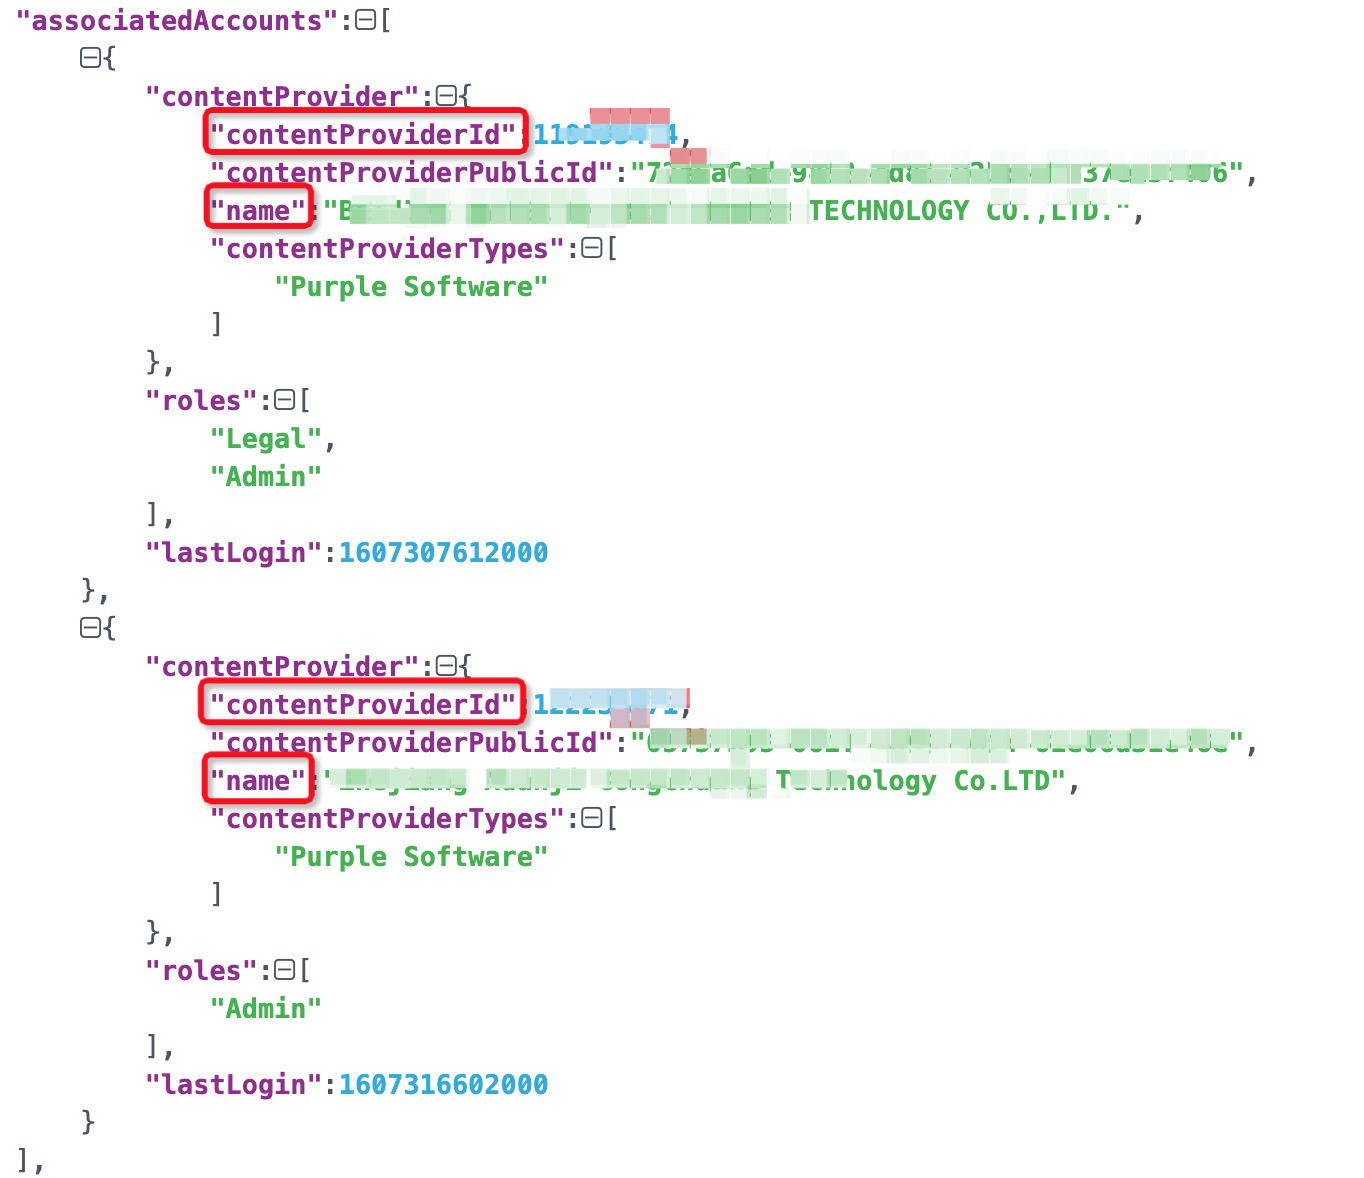
组织名称 和 itc_team_id 字段
Fastfile
1 | default_platform(:ios) |
主要 Action:
gymgym # alias for build_ios_appbuild_app # Alias for the build_ios_app action
deliverdeliver Alias for the upload_to_app_store actionappstore Alias for the upload_to_app_store actionupload_to_app_store : Upload metadata and binary to App Store Connect (via deliver)
pilotpilot Alias for the upload_to_testflight actionupload_to_testflight : Upload new binary to App Store Connect for TestFlight beta
常用自带 Action:
| action | desc |
|---|---|
latest_testflight_build_number |
Fetches most recent build number from TestFlight |
appledoc |
Generate Apple-like source code documentation from the source code |
check_app_store_metadata |
Check your app’s metadata before you submit your app to review (via precheck) |
使用 $fastlane actions,查看更多自带 Action;
Deliver
deliver uploads screenshots, metadata and binaries to App Store Connect. Use deliver to submit your app for App Store review.
1 | $ fastlane deliver --help //查看工具介绍 |
跳过某些选项1
$ fastlane deliver --skip_binary_upload [--skip_screenshots] //跳过
Downloads existing metadata and stores it locally. This overwrites the local files.
1 | $ fastlane deliver download_metadata --verbose // 下载 metdata 数据 |
Downloads all existing screenshots from App Store Connect and stores them in the screenshots folder
1 | $ fastlane deliver download_screenshots --verbose //下载截图 |
Generate HTML Summary without uploading/downloading anything
1 | $ fastlane deliver generate_summary --verbose |
关于设置代理:
因为 deliver 使用系统 Application Loader.app 进行文件上传,可以修改 net.properties 文件中代理设置。
该文件路径:
Xcode.app ▸ Contents ▸ Applications ▸ Application Loader.app ▸ Contents ▸ itms ▸ java ▸ lib ▸ net.properties
设置方法可以参考:
代码签名
fastlane 可以自动进行签名,如果你遇到一些错误,请首先检查代码和资源文件是否能够正常编译和打包,在使用命令工具前可以提前模拟一下,这样做的目的可以排除 fastlane 编译和归档时的错误率。(注:签名配置文件存放位置:~/Library/MobileDevice/Provisioning Profiles)
xcodebuild 自带更新和签名工具,需要添加 -allowProvisioningUpdates 配置。查看 method 更多选项export_method。
更多设置方法可以查看
方法一:自动配置:1
2
3
4
5
6
7
8
9lane :beta do
build_app(
workspace: "Example.xcworkspace",
scheme: "Example",
clean: true,
export_xcargs: "-allowProvisioningUpdates",
export_method: "app-store"
)
end
方法二:手动配置
1 | lane :beta do |
方法三 : 手动管理和自动配置
1 | lane :beta do |
方法四:match管理
还没有研究,git repo 和 match 环境匹配,代码 sync_code_signing
https://codesigning.guide/
更新
若将旧版本升级到新版本,你只需要执行下面命令:1
$ fastlane update_fastlane
若不想从旧版本升级到新版本,可以重新覆盖安装:1
$ brew reinstall fastlane
卸载
卸载和安装相对应1
$ brew uninstall fastlane
FQA
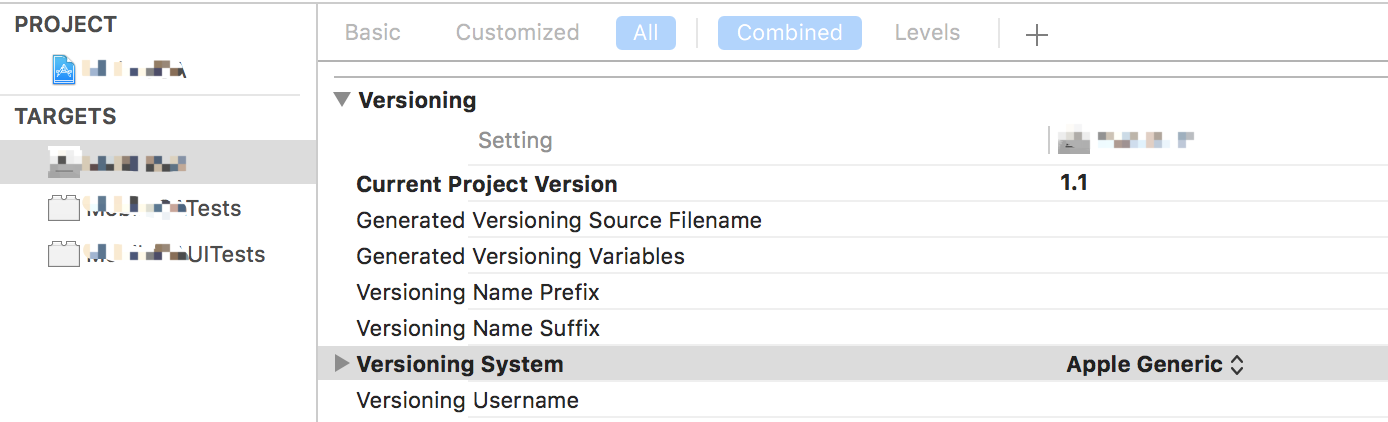
Q: 若遇到这样的提示 Apple Generic Versioning is not enabled in this project. Before being able to increment and read the version number from your Xcode project, you first need to setup your project properly.
A:
- 设置 Current Project Version 的值,建议设置为浮点型;
- 将 Versioning System 键的值选中为 “Apple Generic”。具体请参考Automating Version and Build Numbers Using agvtool
set-auto-increment-version
Q: 当 fastlane deliver --overwrite_screenshots download_screenshots时,可能遇到 Couldn’t download already existing screenshots from App Store Connect.
A: 在 Deliverfile 文件中添加 require 'open-uri' 即可解决。
Q:当上传返回的错误信息类似为 Return status of iTunes Transporter was 1: Cannot proceed with delivery: an existing transporter instance is currently uploading this package 时,说明上传端口被占用。
原因:iTunes Transporter 是与 Xcode 绑定在一起的 Java 应用程序,上次上传时没有退出,端口一直处于被占用状态。
解决方法:需要先退出占用此端口的进程,在活动监视器中,找占用端口的进程,一般是进程名称为java,退出占用端口的进程后,然后再上传。(端口号一般为101,它可能变化)
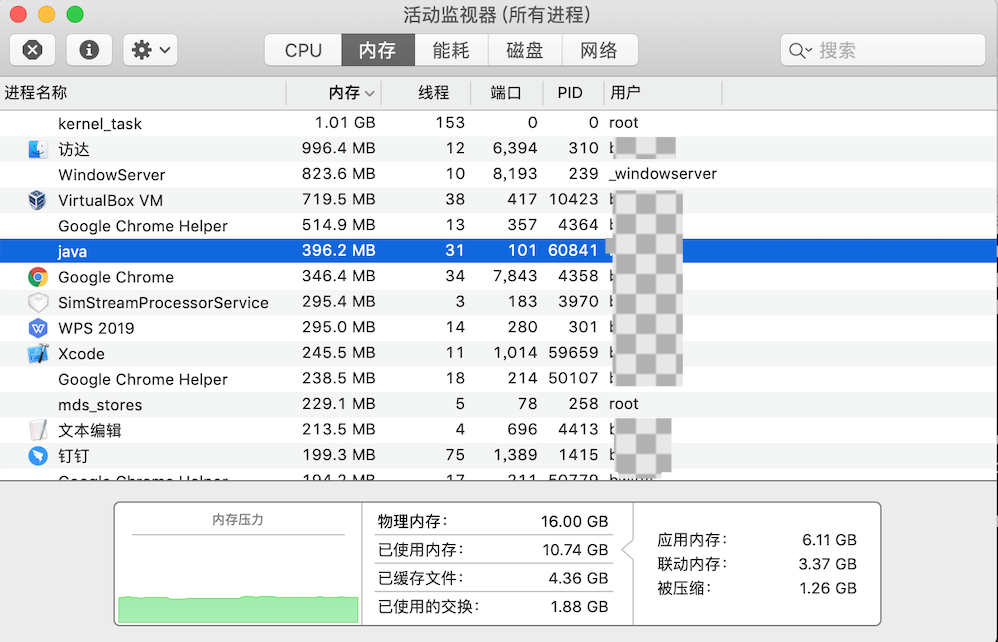
活动监视器中占用此端口的线程
参考资料
文档信息
- 版权声明:自由转载-保持署名-非商用-非衍生 ( CC BY-NC-ND 4.0 )
